
Last updated November 21, 2026
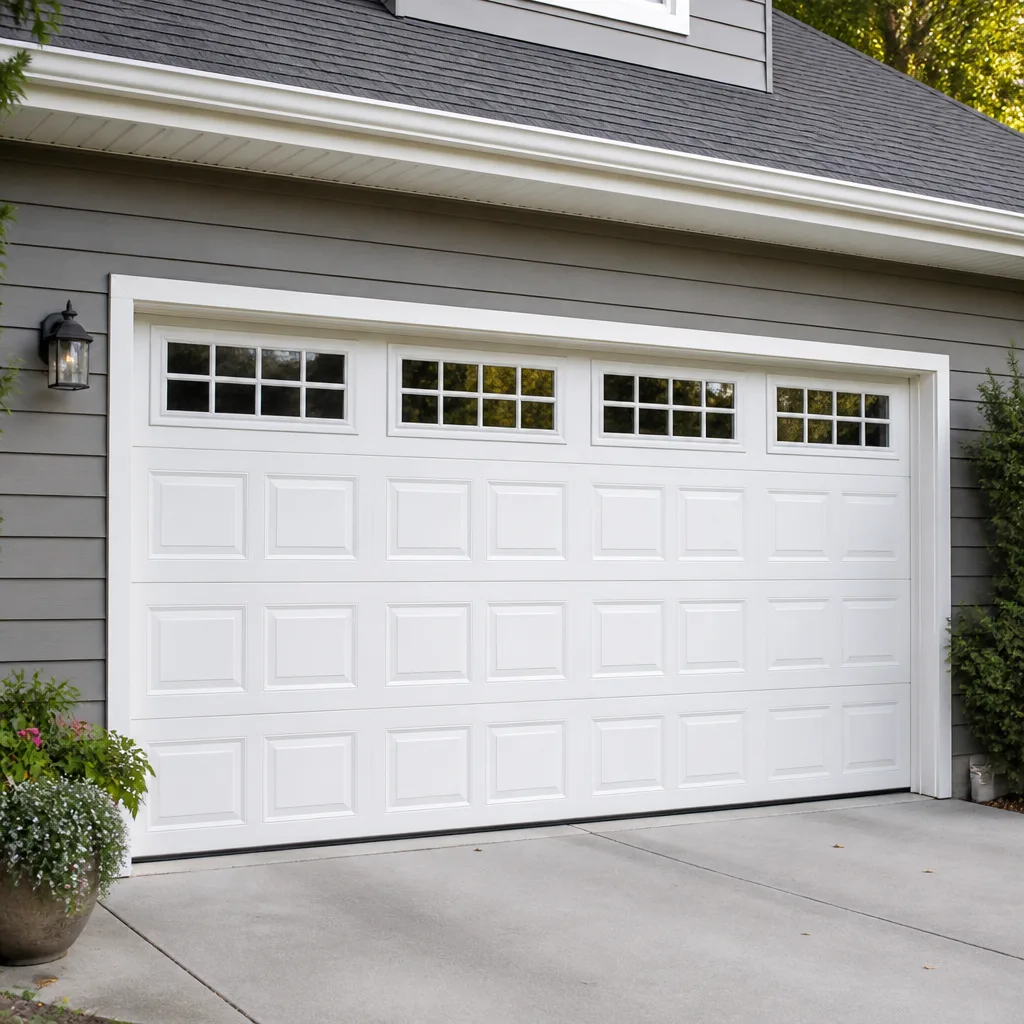 Raised-panel steel
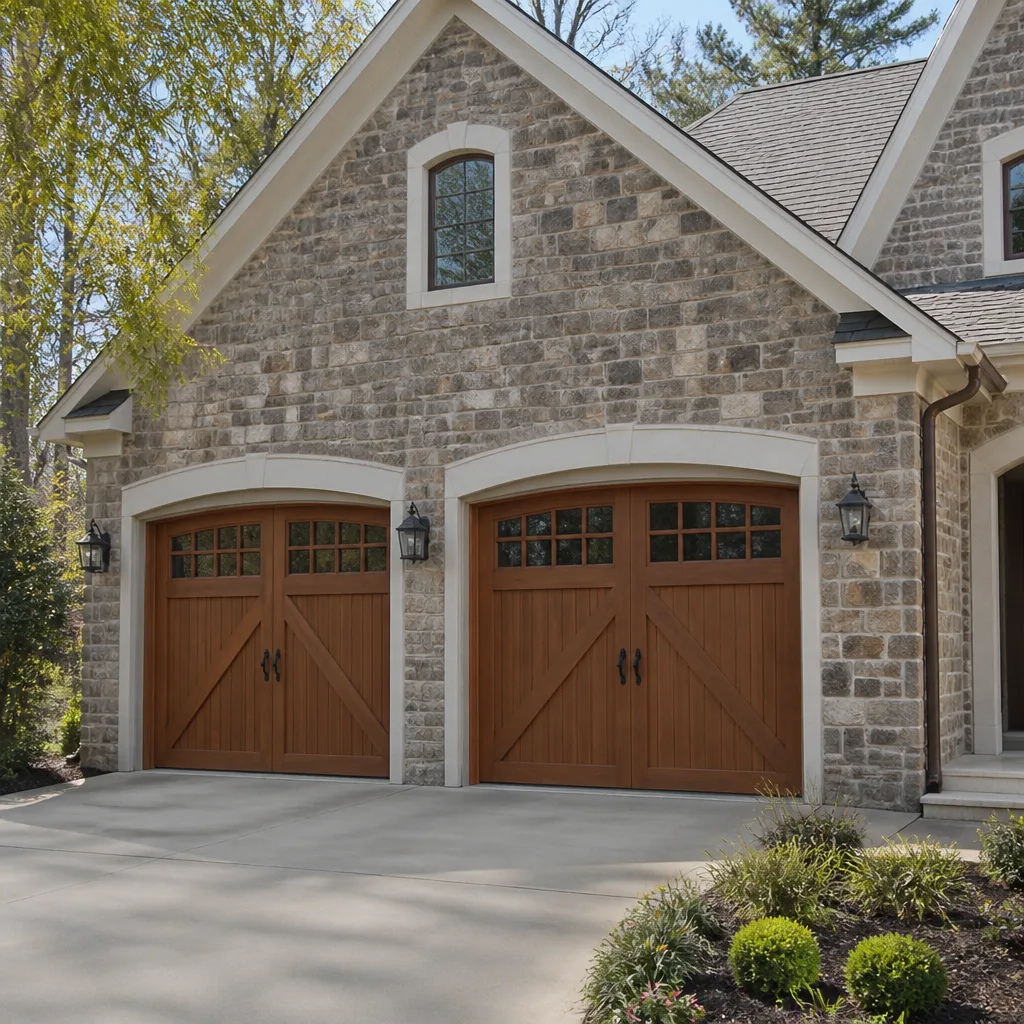 Carriage house
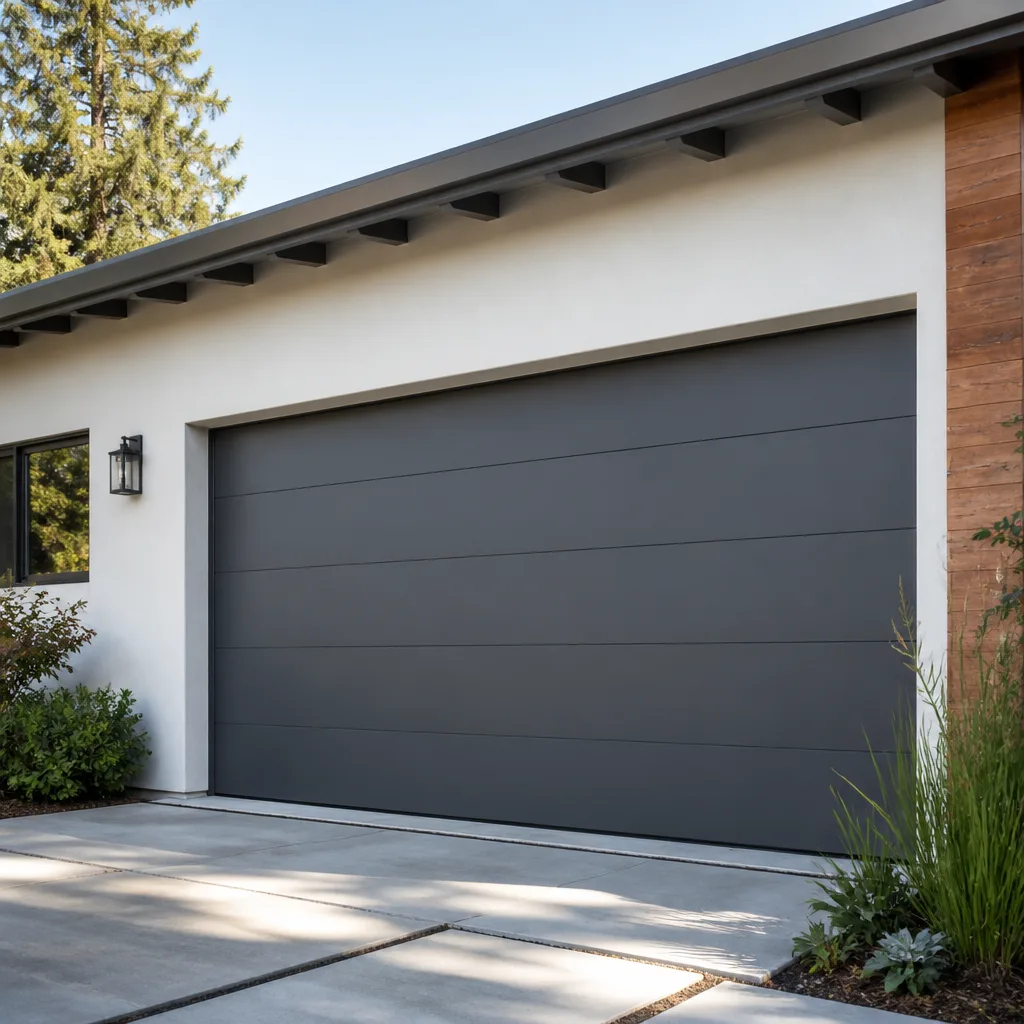 Modern flush
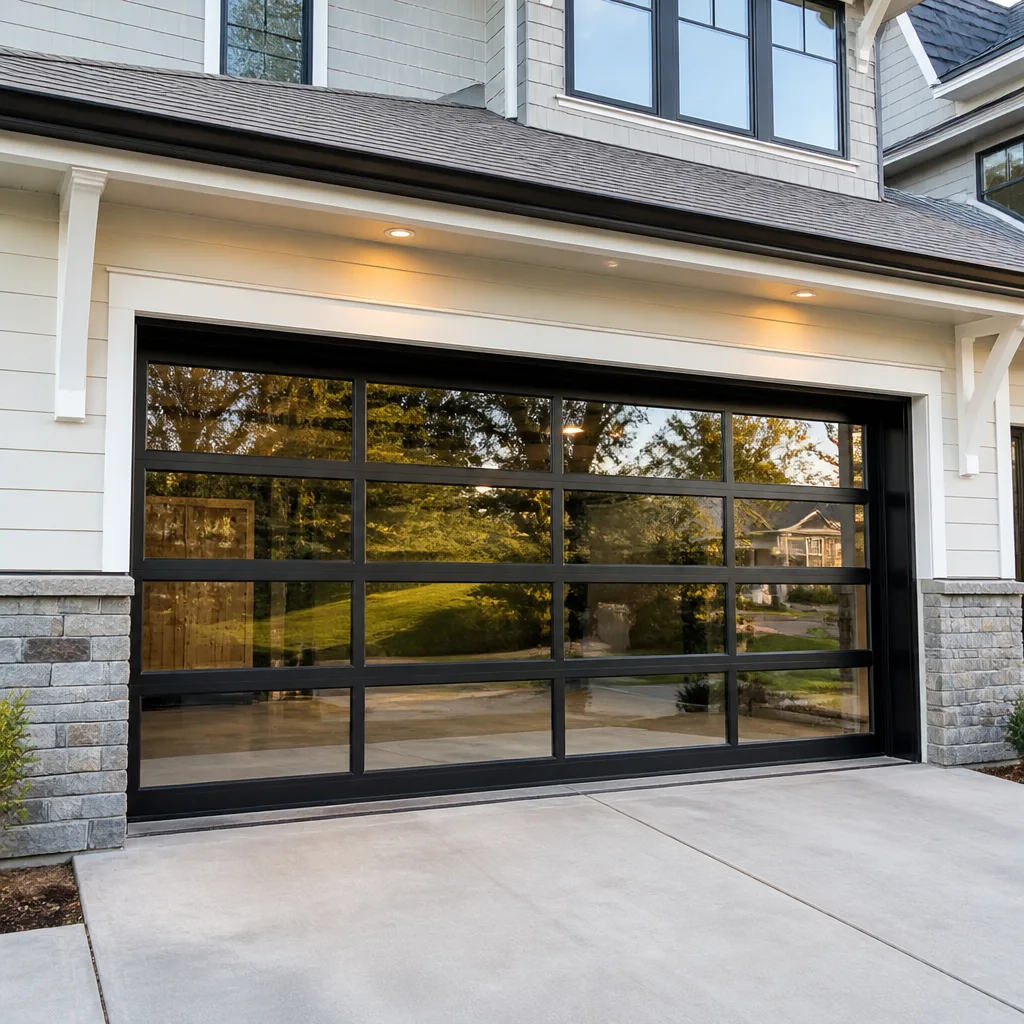 Full-view glass
 LiftMaster openers
 Chamberlain openers
Full 25-point door and opener safety check with every visit - springs, cables, rollers, tracks, and your LiftMaster or Chamberlain opener included
You get a price before we start. It does not change when the pro arrives.
Get your free estimateDIY vs Professional Garage Door: The Easton Homeowner’s Decision Guide
Most homeowners assume the DIY-or-pro question comes down to skill. It doesn’t. Garage door work splits cleanly into two categories: tasks where a careful homeowner with a ladder and an afternoon can genuinely do the job, and tasks where the stored energy inside the system doesn’t care how handy you are. A torsion spring under tension can release with enough force to break bones, and that risk exists whether you’ve watched ten videos or none. This guide draws that line task by task, walks through what DIY actually costs once you count tools and mistakes, and explains how a first attempt can complicate the professional repair afterward. If you live in Easton and your door is misbehaving, you’ll finish this with a clear answer about what to touch and what to leave alone.
Quick Answer
In Easton, the DIY-versus-professional call should be made per task, not per personality. Adjusting limits, lubricating rollers, tightening brackets, and replacing batteries or remotes are safe for most homeowners. Replacing torsion or extension springs, repairing cables, and adjusting high-tension hardware are not DIY tasks under any circumstances because the release energy is unforgiving of a single mistake. Everything between those poles – panel damage, opener logic boards, track alignment – comes down to your comfort and the tools you already own. When the job touches springs or cables, call a specialist. When it doesn’t, the choice is genuinely yours.
Styles & brands we work with
- Raised-panel steel
- Carriage house
- Modern flush
- Full-view glass
- LiftMaster openers
- Chamberlain openers
Table of Contents
- The Three-Tier Safety Classification
- What’s Actually DIY-Safe: The Short List
- The Never-DIY Category: Springs and Cables
- The Tools Question: What You’d Need to Buy
- The Honest Cost Comparison
- Ohio Insurance Implications of DIY Repairs
- How to Describe a Botched Repair to a Technician
- Common Mistakes to Avoid
- When to Call a Professional
- Frequently Asked Questions
The Three-Tier Safety Classification
Every garage door repair falls into one of three tiers, and knowing which tier you’re in is the entire decision. Tier one is work any reasonably careful homeowner can do with a step stool. Tier two is work that’s mechanically possible but carries real risk of making things worse, either through injury or through a secondary repair. Tier three is work where the system stores enough energy to hurt you regardless of your experience. Here’s how the tasks sort:
Tier 1 – DIY-Safe
- Replacing remote batteries and re-pairing remotes to the opener
- Adjusting opener travel limits and force settings through the wall control
- Lubricating hinges, rollers, and the torsion bar with a garage-door-specific lubricant
- Tightening visible bolts on hinges and brackets (never the spring hardware)
- Clearing obstructions from the safety photo-eye path and wiping the lenses
- Replacing a wall-mounted push button or a keypad
- Wiping down panels and touching up minor scuffs
Tier 2 – DIY-Possible With Real Risk
- Replacing a single roller or hinge (doable, but the door must be fully closed and you must never remove a bottom bracket)
- Realigning a bent track section on a light door (doable on some systems, easy to make worse)
- Replacing a logic board or capacitor in the opener head (doable if you’re comfortable with small electronics, and the opener must be unplugged)
- Replacing a bottom weather seal (straightforward, but the door needs to be positioned correctly)
- Replacing a bent or damaged bottom bracket on some designs, though we generally advise against it
Tier 3 – Never DIY
- Torsion spring replacement or adjustment
- Extension spring replacement or adjustment
- Cable replacement, cable re-spooling, or cable tensioning
- Removing or reinstalling a bottom bracket that holds cable tension
- Any work on a door that has a broken spring and is being held up by the opener alone
If your task is tier three, the answer isn’t “be careful.” The answer is that a trained technician carries specific spring winding bars and knows the winding direction and count for your door’s configuration. That’s the whole job. Our garage door repair team handles spring work as a standard service, not as a specialty add-on, because we do it constantly and we know what a wound spring needs to look like before it’s under tension.
What’s Actually DIY-Safe: The Short List
We want to be honest here rather than reflexively protective. Plenty of garage door maintenance genuinely belongs in the homeowner’s hands, and doing it saves you a service visit that was never necessary. The clearest DIY wins in Easton homes:
- Re-pairing a remote. Every opener on the market uses a pairing routine that takes under a minute with the manual. Genie and LiftMaster systems both walk you through it, and if you’ve lost the manual, the model number on the opener head gets you a PDF in five minutes.
- Adjusting travel limits. If the door doesn’t fully close, or reverses before touching the ground, the travel limit screws on the opener are labeled. A quarter turn at a time, testing between each, usually resolves it. Don’t touch the force setting unless the manual specifically says to.
- Lubricating moving parts. A silicone-based or lithium grease on the hinges, rollers, and torsion bar (not the tracks) quiets most doors and reduces roller wear. This is a fifteen-minute annual task that genuinely extends the life of the hardware.
- Photo-eye cleanup. When a door reverses immediately after starting to close, the culprit is usually a dirty or misaligned photo-eye. Wiping both lenses and confirming they face each other fixes most of these.
- Replacing weather seals. Bottom seals on Clopay and Amarr steel doors are a common replacement item, and the door just needs to be fully closed and the track clear for the new seal to slide in.
- Wall button and keypad swaps. Simple low-voltage wiring, no stored energy, no risk.
If your symptom lands on one of these, do the job. If it doesn’t, keep reading, because the leap from tier one to tier three is bigger than it looks.
The Never-DIY Category: Springs and Cables
Here’s the counterintuitive truth about garage door spring work: it’s not that homeowners get hurt because they’re careless. It’s that the physics of a wound torsion spring is unforgiving of a single missed detail, and even experienced tradespeople treat it with respect. A torsion spring under full winding holds hundreds of pounds of stored energy. When it releases unexpectedly, it releases instantly. If you’re anywhere near it, that energy transfers to you. Skilled DIYers who have replaced their own water heater, rewired a light fixture, and built a deck still shouldn’t touch the springs.
The same goes for the cables, and most homeowners don’t realize this until it’s too late. On a torsion spring system, the cables that run down each side of the door are under tension from the same spring. There is no “safe” part of the cable to work with while the spring is wound, and there is no “safe” way to release a cable that has popped off its drum without first relieving the spring tension. Bottom brackets – the sturdy steel plates at the bottom corners – are especially dangerous because they’re what holds the cable in position. Removing one while the spring is wound can turn the bracket and the cable into a projectile.
This is why we treat spring repair as a core service and only a core service. Our technicians have up to 8 years of experience, use winding bars sized for the specific spring, and can confirm spring specifications for the major door brands installed across Easton, including Wayne Dalton and Clopay models with distinctive spring configurations. If your door has a broken spring, don’t run it with the opener hoping it works – the opener is designed to lift the door with the spring assisting, and running it without that assist overloads the motor and stresses the door panels. Leave the door down and call us. If the door is stuck open and you need garage door opener repair help, we can also handle the opener side if the motor has been stressed by a broken spring.
The Tools Question: What You’d Need to Buy
The tools question usually ends the DIY discussion for a homeowner who is being honest with themselves. Everyone has a screwdriver and a ladder. Far fewer people have the specialty tools that a proper garage door repair requires, and even fewer need them twice.
Here’s what a professional spring job actually needs:
- Winding bars sized for the door. Torsion springs are wound with specific-length steel bars that slot into the winding cone. Using the wrong bar or a tool not designed for the job (the classic internet shortcut) is a known cause of injury.
- A winding count and direction reference. Spring tension is set by winding to a specific count, and getting it wrong means the door lifts wrong or doesn’t lift at all – or the spring fails again within weeks.
- Spring calipers and a sizing chart. The spring must match the door’s weight, and its wire diameter and length are what determine capacity. Replacing a spring with the wrong one is the most common cause of repeated spring failures.
- New springs on hand. This is the hidden cost of DIY spring replacement: you have to source the correct spring before you can do the job, and a wrong-size spring from a hardware store is money thrown at a door you can’t use.
Add it up and the tooling cost alone usually exceeds what a single spring repair costs to have done. This is the same reason most homeowners don’t own a torque wrench or an impact driver for one job – the economics don’t work unless you’re going to use the tool regularly. For a one-time spring replacement, they don’t.
The exception is basic hand tools. If you’re going to tighten a hinge or lube the rollers, a standard socket set and a can of garage-door lubricant is a reasonable investment. Just don’t buy a winding bar for a one-time job.
The Honest Cost Comparison
The honest cost comparison usually surprises homeowners in both directions. DIY looks cheap until you count what you have to buy, how long the job actually takes, and the odds you’ll need a second repair when the first attempt goes sideways. Here’s how we see it play out.
| Task | Typical DIY cost | Typical professional cost (estimated range) |
|---|---|---|
| Remote re-pairing or battery swap | Under $20 in parts | Not a job for a service call |
| Lubrication and inspection | $10-15 for lubricant | Included with many repairs |
| Photo-eye realignment or cleaning | $0 | Not a job for a service call |
| Single roller or hinge swap | $5-15 per piece | Small repair visit; ask for a free estimate |
| Weather seal replacement | $25-50 for seal material | Ask for a free estimate |
| Torsion spring replacement (single) | $40-80 for springs, plus $60-100 in specialty tools, plus elevated risk | Typical range $180-$340 installed |
| Matched pair of torsion springs | Approximately double the single-spring cost above | Approximately double the single-spring range above |
| Cable replacement (single side) | Not advised | Ask for a written estimate; typically packaged with spring work |
| Full door installation | Not realistic for most homeowners | Typical range varies widely by door; ask for a free measure and written price |
Two things to notice. First, spring prices are per spring, not per pair. A door with two springs needs both replaced together because a matched pair carries the load evenly, and one old spring paired with one new spring leads to premature failure of the new one. The pair costs about twice the single-spring range. Second, the DIY number looks cheap until you factor in tools, the potential for a wrong-size spring, and the chance that a mistake means you’re calling a professional anyway, with the added cost of undoing the damage. That’s not fear-mongering. It’s how the math usually lands. Our pricing is set per job by a written estimate, quoted and agreed before any work starts, and the estimate is free. If the estimate hasn’t been agreed, no work begins. That’s the rule.
Ohio Insurance Implications of DIY Repairs
Homeowner’s insurance in Ohio generally covers sudden, accidental damage from events like a car hitting a garage door, storm damage, or a fire. What a typical policy usually will not cover is damage resulting from an unpermitted or unqualified repair that later fails and causes a secondary loss – and this is where the DIY-versus-professional question carries consequences beyond the repair itself.
Here’s how to think about it in practical terms:
- An injury during a DIY repair. A homeowner injured doing their own spring repair typically finds that the injury, however severe, isn’t a claim against their homeowners policy. That’s a personal safety issue, not a coverage one, and it’s the strongest argument against DIY spring work regardless of coverage.
- A repair that fails and damages the door or vehicle. If a DIY spring replacement fails and drops the door on a vehicle, an insurer may reasonably ask whether the failure was caused by improper installation. That doesn’t automatically deny a claim, but it does mean the conversation starts with documentation you probably don’t have.
- Professional documentation matters for larger claims. If a garage door fails and damages something, a written invoice from a licensed professional showing the repair was done properly supports the claim far better than a receipt for parts from a hardware store.
- HOA and neighbor considerations. Some Easton neighborhoods have HOA rules about exterior work and appearance. Sticking to standard installations and manufacturer-approved parts avoids the follow-up conversation.
We’re not insurance advisers, and we recommend checking with your carrier if you have a specific claim scenario. What we can tell you is that our written estimates and invoices give you a paper trail. If you’re going to spend money on a repair, having the documentation is genuinely worth something. That’s one of the reasons we tell readers with a real door problem to work with a specialist who can quote in writing and hand back a documented invoice when the job is done.
How to Describe a Botched Repair to a Technician
If you’ve already attempted a repair and it didn’t work, don’t be embarrassed – it happens every week, and it doesn’t change how we approach the job. What it does change is the diagnosis. The technician is now working from your description of both the original problem and what you changed, and the more precisely you can describe what you did, the less time the diagnosis takes.
- Start with the original symptom. “The door wouldn’t close past halfway” or “The opener clicked but nothing moved.” A clear starting symptom is the single most useful piece of information you can give.
- Describe what you touched. “I adjusted the travel limit screws on the opener” or “I replaced the bottom roller on the left side.” Be specific about what you adjusted, even if you’re not sure you adjusted it correctly.
- State the new symptom. Whatever is happening now, even if it’s different from the original problem, tells the technician what your change did.
- Mention any sounds. A thumping at the top of the track, a grinding at the operator head, a sharp metal ping – these are the diagnostic equivalent of directions.
- Note anything disconnected. If you removed a photo-eye, unplugged the opener, or took a bracket off, say so. Technicians don’t judge; they need to know what state the system is in.
- Have the model numbers ready. The opener head has a model number. A Clopay, Amarr, or Wayne Dalton door usually has a sticker on the inside of a top or bottom panel. The spring has a color code and a spec stamp. All of these save diagnosis time.
When you call, we ask for the model number because we work with Genie, LiftMaster, Chamberlain, Clopay, Amarr, Wayne Dalton, Craftsman, and Raynor equipment regularly. Recognizing the system on the call means the technician arrives knowing what to look for, not starting from zero. Our technicians have up to 8 years of experience and have seen most of what a homeowner can do to a door by accident, so there’s nothing to hide. Honest description, faster fix.
Common Mistakes to Avoid
- Running the opener with a broken spring. The opener is not designed to lift the door unaided. Running it repeatedly burns out the motor and can warp the door panels or strip the drive gear. Leave the door down and get the spring fixed first.
- Replacing one spring when the pair is done. A matched pair shares the load. Replacing only one spring with an old one still installed means uneven tension and premature failure of both. Replace the pair together.
- Using hardware-store springs without a size match. Springs are spec’d by wire diameter, length, and inside diameter. The wrong spec is a spring that fails quickly or one that doesn’t lift the door. This is the most common DIY spring mistake, and it usually costs more than having the job done right the first time.
- Adjusting the force setting to compensate for a dragging door. If the door needs more force to move, the problem is physical – a worn roller, a bent track, a failing spring – not a force setting. Cranking the force up hides the symptom and stresses the opener.
- Lubricating the tracks. Tracks should stay clean and dry. Lubricant attracts grit, grit wears rollers, and the door gets louder and harder to operate. Oil the moving parts, not the tracks.
- Tightening the spring hardware thinking it will stop a noise. If a spring is making noise, the spring is failing. Tightening the bolts on the winding cone or the center plate does nothing but increase the chance of an injury when the spring lets go.
- Removing a bottom bracket to fix a cable. This is the mistake that sends people to the emergency room. The bottom bracket holds cable tension, and it can release with enough force to cause serious injury. Never work near it while the spring is wound.
If any of these describe your situation right now, stop and call. The repair will be simpler than the recovery.
When to Call a Professional
Call a professional today if the door has a broken spring, a slack or off-track cable, a bottom bracket that has shifted, or a door that won’t stay up when you lift it manually. Call if the door is visibly crooked in the frame – that usually means a cable has snapped on one side and the door is being held by the operator rather than the spring. Call if the opener motor runs but the door doesn’t move, or if the door reverses before closing and the photo-eye and travel limits are clean. Call if the door has fallen off a track or the panels have buckled. And call if you’ve already attempted a repair and the symptom has changed – that’s the moment where more DIY can turn a small repair into a large one. If you’re the original owner of a door that’s been in place long enough for the springs to weaken, a professional inspection can head off a failure before it happens. Easton Garage Door Repair Pros offers free estimates in Easton. Call (866) 926-2341. We answer 24/7, with fast dispatch from 7am to 7pm, Sunday through Friday.
Brand-Specific Notes for Easton Homeowners
Door and opener brands don’t change the safety classification, but they do change how a repair gets diagnosed and what parts a technician needs to have on hand. A few things we’ve learned working on the most common brands in Easton:
Genie and LiftMaster openers have distinctive logic board and travel limit designs. Most travel and force adjustment questions in these systems get resolved at the wall control in a few minutes, and the model number on the head unit gets us to the right parts list without a second visit. Clopay and Amarr steel doors – the workhorses of suburban Easton neighborhoods – usually need spring replacements that match the panel weight and insulation configuration, which is why we ask for the door’s model sticker. Wayne Dalton doors sometimes use extension springs rather than torsion, and the winding and cable handling are different enough that a technician needs to know the exact configuration before touching anything.
We work on all of these brands, and we handle garage door installation as well as repair, which means we’re not going to quote you a repair that should be a replacement, and we’re not going to try to talk you into a new door when a straightforward repair will set it right. Springs, cables, opener logic boards, panels, weather seals, parts – we source and supply on the same side of the job, which is what keeps a repair from becoming a two-visit affair.
See the difference
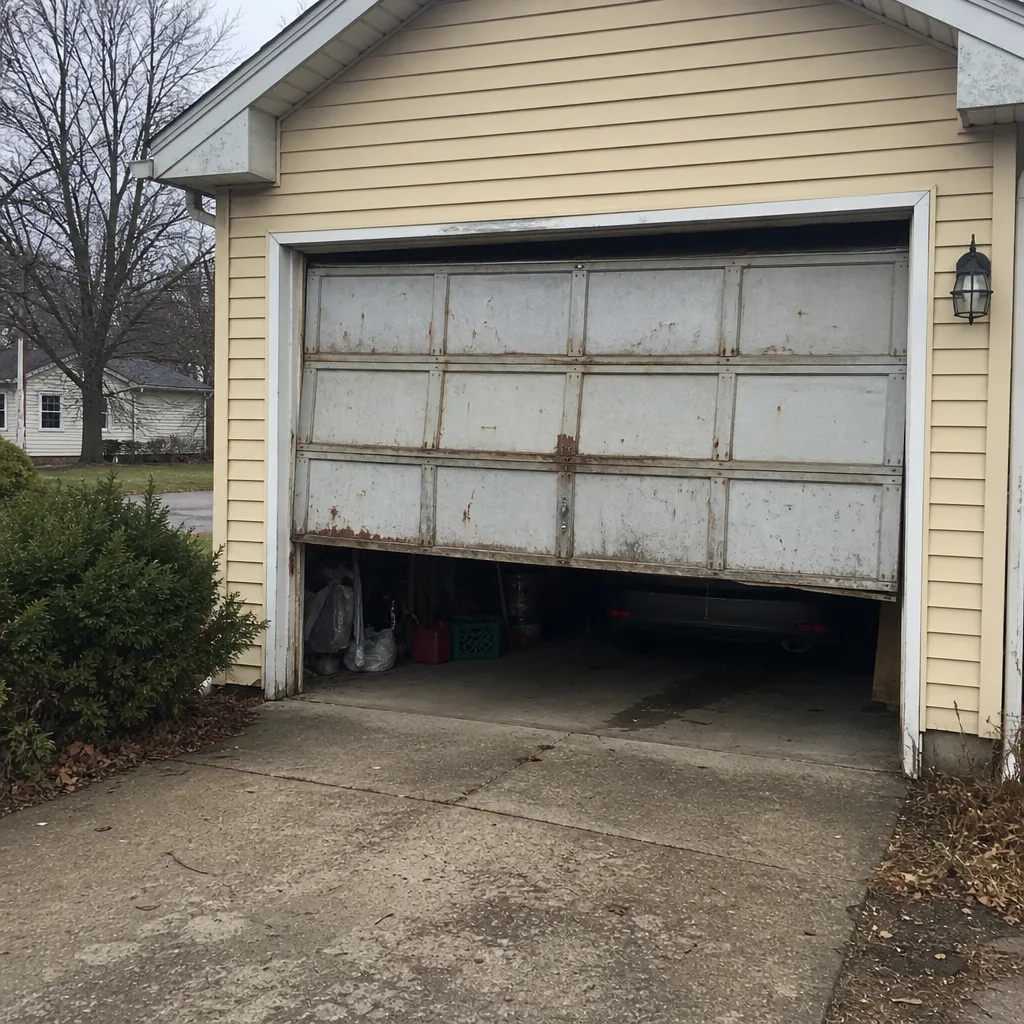 Before
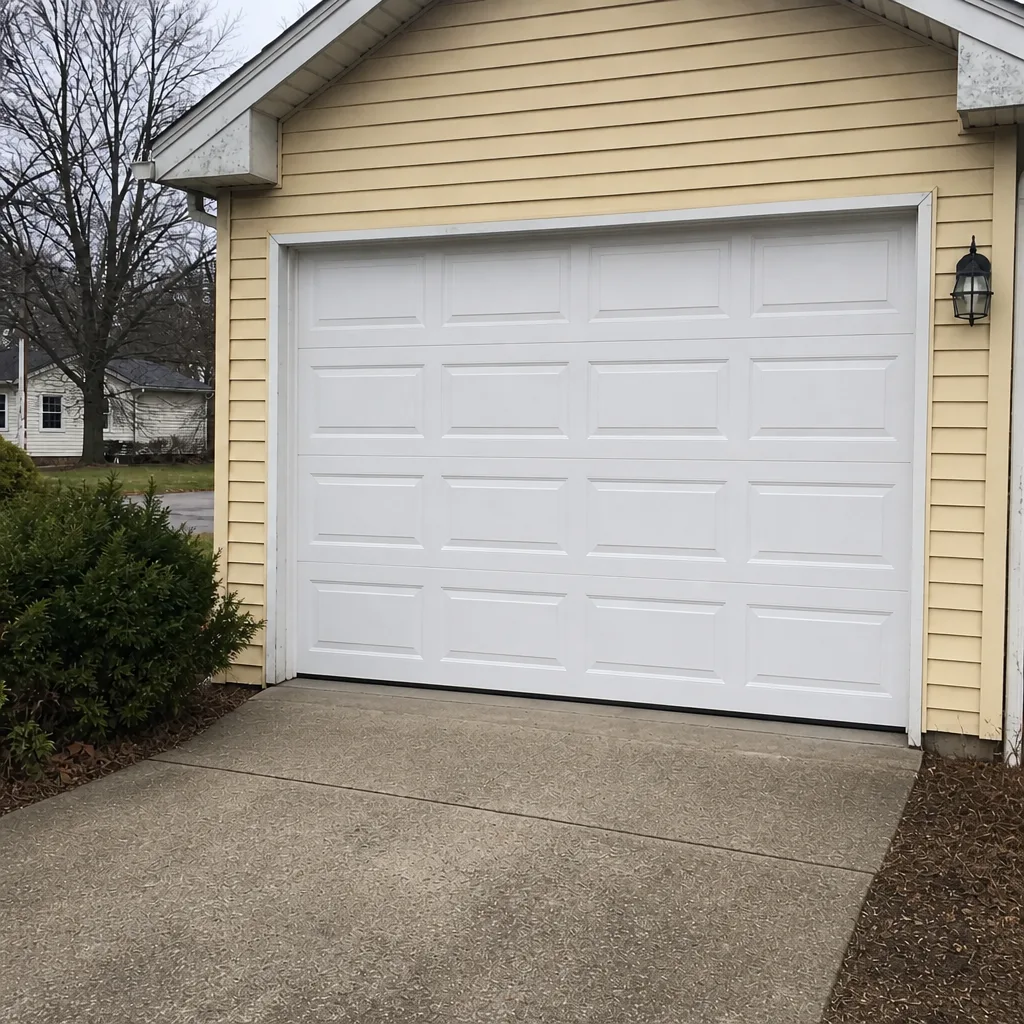 After
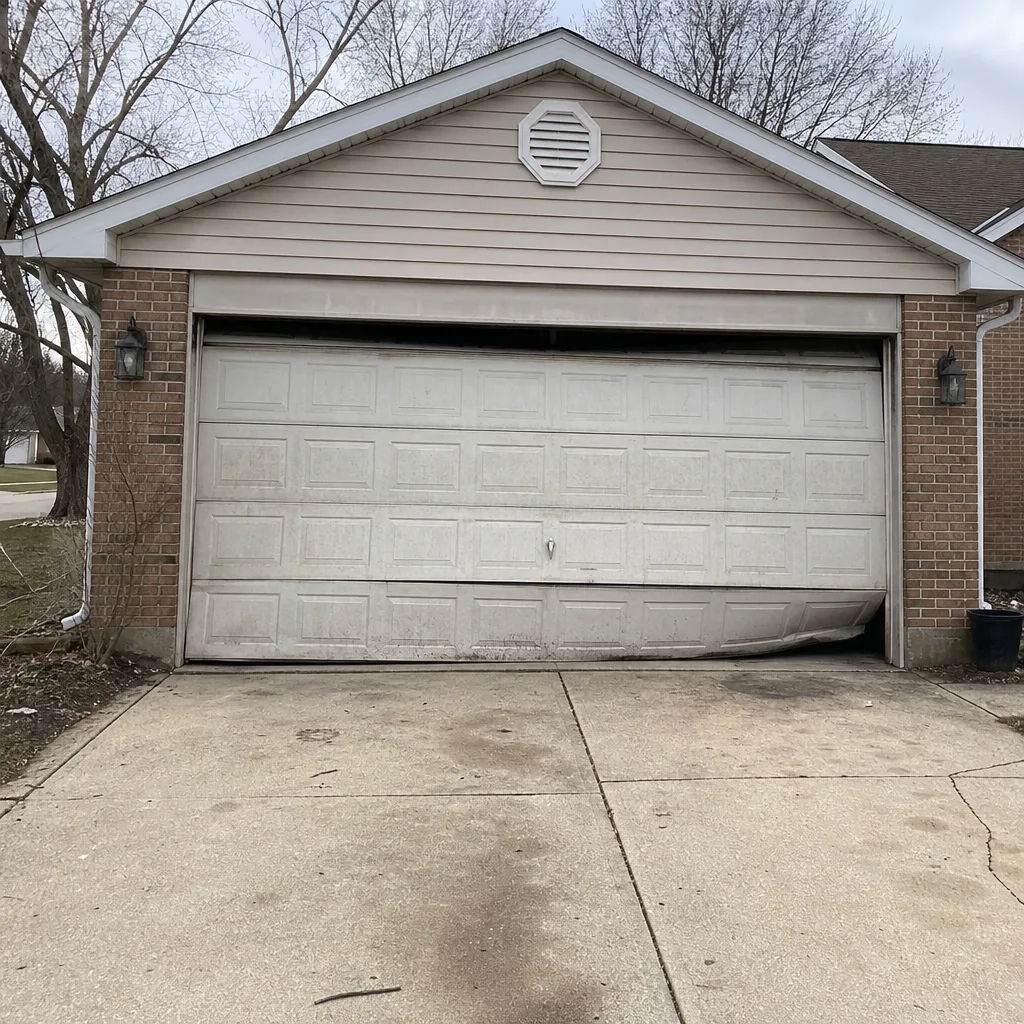 Before
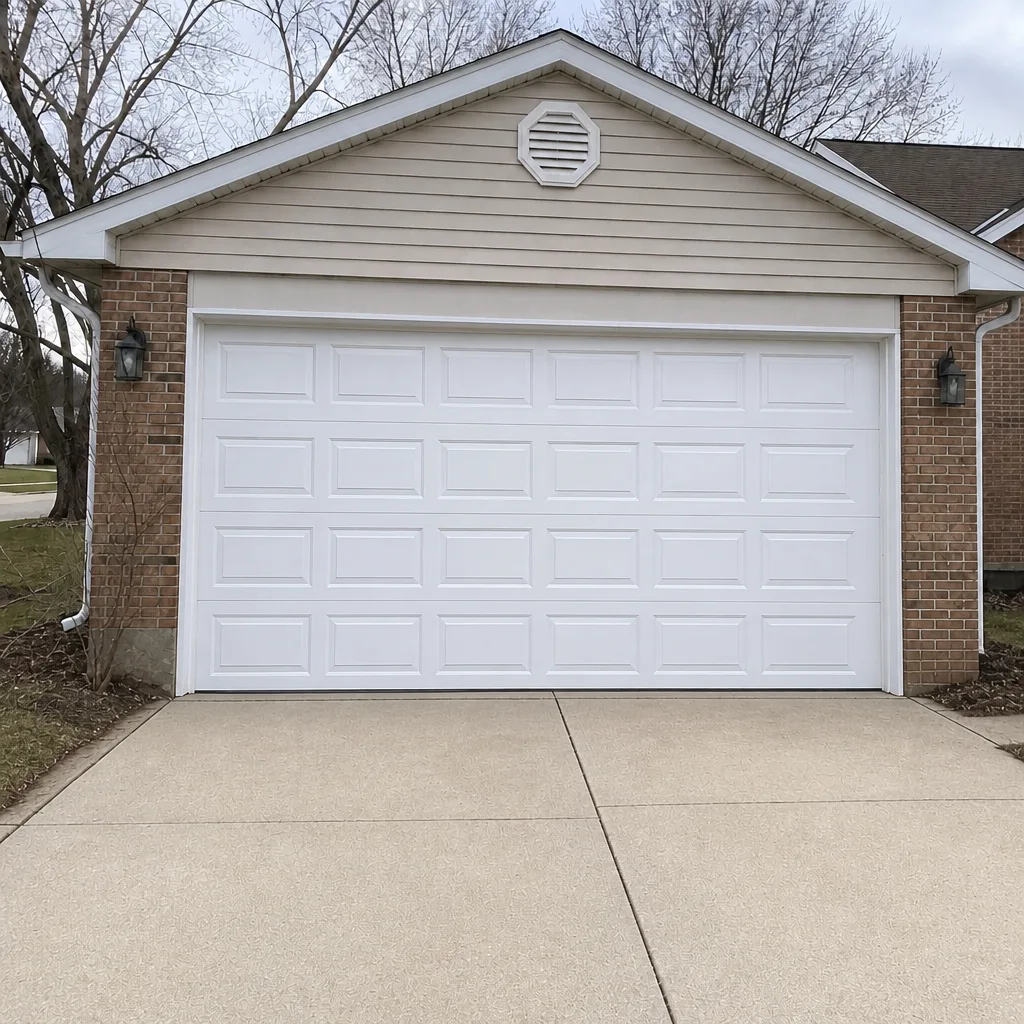 After
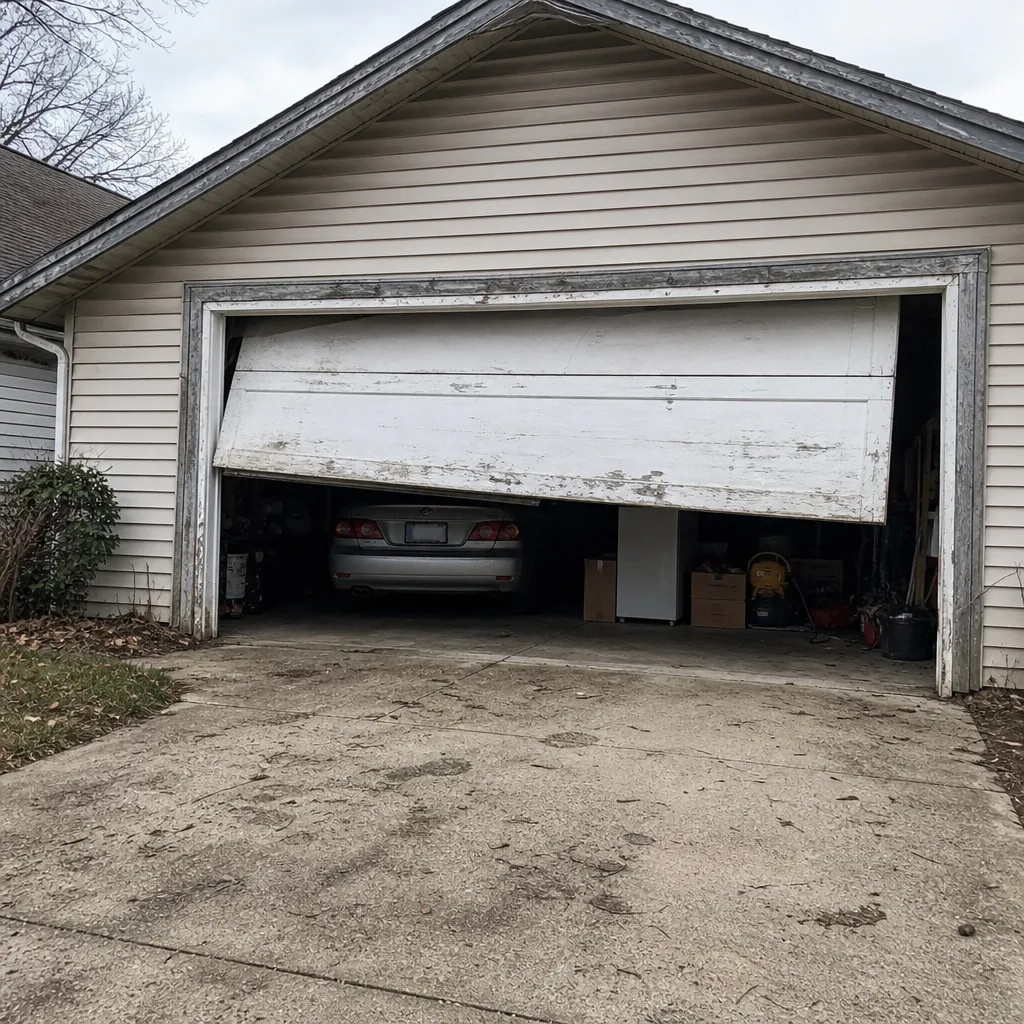 Before
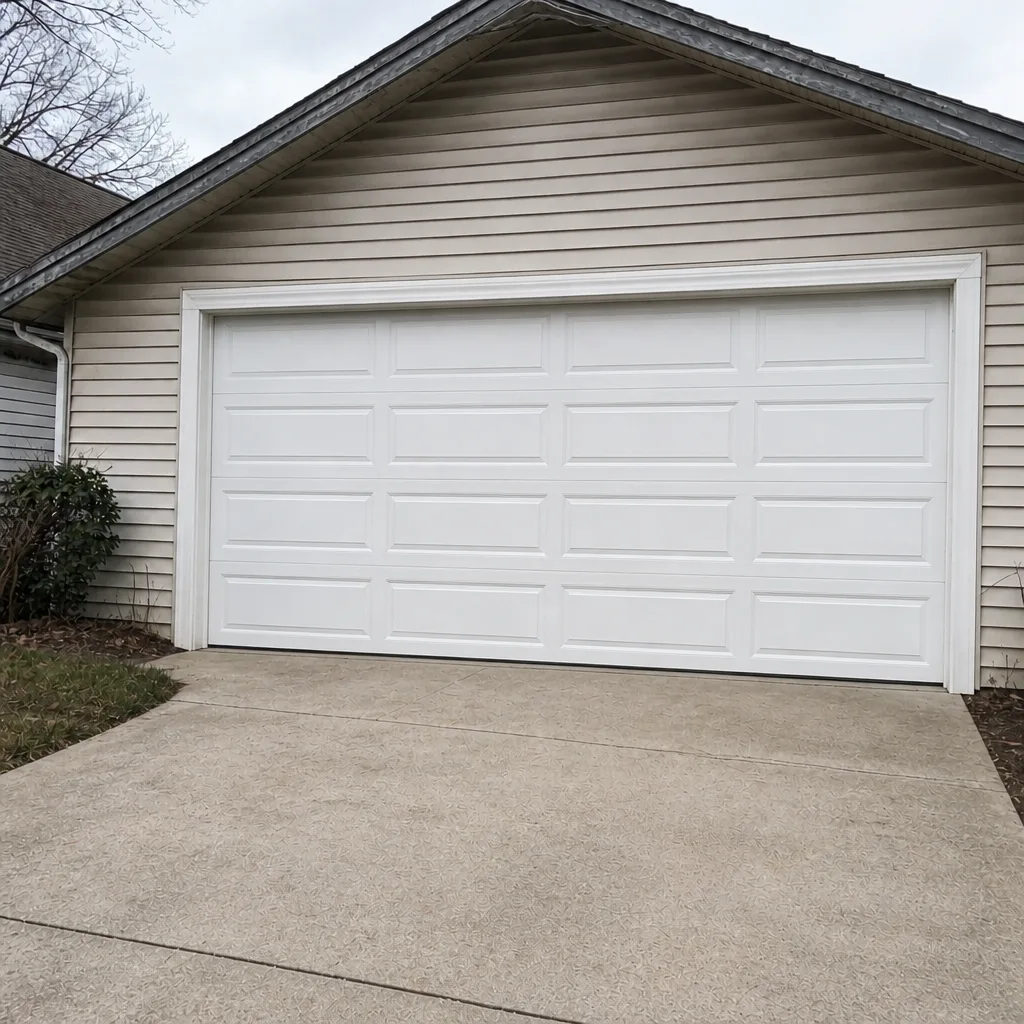 After
What a Repair Visit Typically Involves
Homeowners who haven’t worked with a garage door specialist are often surprised by how structured a repair visit is. Here’s what a typical visit looks like, so you know what to expect when the technician arrives:
- Diagnosis and written estimate. The technician inspects the door, opener, springs, cables, rollers, tracks, and hinges, then writes a scope of work and a price. No work starts until you approve the written estimate.
- Safety staging. If springs or cables are involved, the door is secured, opener power is disconnected, and the spring tension is relieved properly before anything is removed.
- Part replacement. Broken springs are replaced as a matched pair in most cases, with the correct spec for the door’s weight and hardware. Cables are replaced or re-spooled only after spring tension is fully released.
- Full system rebalance and test. After the repair, the door is cycled repeatedly, the balance is verified with the door at half height, the opener force is checked, and the photo-eye safety system is re-confirmed.
- Paperwork and documentation. You get a written invoice describing the repair, the parts used, and any recommendation for follow-up work. This is the document that matters if you ever need to reference the repair for insurance or an HOA.
One point we stress: if the door is on a torsion system and the original problem was a snapped spring, the technician is likely to recommend replacing both springs even if only one broke. That’s not an upsell. It’s how the physics works – matched springs share the load, and one new and one tired spring creates uneven tension that shortens the life of the new one. A good technician will explain the reasoning and quote the pair and the single so you can see the numbers side by side. We explain it that way because we’d rather have the honest conversation than have someone call three weeks later about a spring that broke again.
Frequently Asked Questions
You shouldn’t replace a garage door spring yourself, no matter how handy you are. Torsion and extension springs store enough energy under tension to cause serious injury if released unexpectedly, and even experienced DIYers who’ve done plumbing, electrical, and carpentry work still shouldn’t touch them. The tools required – winding bars sized for the door, a winding count reference, and a spring spec match – are specialty items a homeowner won’t need twice, and getting the spring spec wrong is the most common cause of premature failure. Call (866) 926-2341 for a free estimate and let a technician handle the spring safely.
Adjusting opener travel limits, re-pairing remotes, replacing remote batteries, lubricating hinges and rollers, cleaning and realigning photo-eyes, tightening visible hinge bolts, and replacing wall buttons or keypads are genuinely DIY-safe tasks. Replacing a single roller or hinge is doable for a careful homeowner with the door fully closed, but keep away from the bottom bracket, which holds cable tension. Anything involving springs or cables is not a DIY task. If your symptom is one of the safe activities and it resolves the problem, you’ve saved yourself a call. If it doesn’t, call us and describe what you did.
A DIY repair doesn’t automatically void a homeowner’s policy, but it can complicate a claim if the repair fails and causes secondary damage. Most Ohio policies cover sudden accidental damage, and a documented professional repair – with a written invoice showing what was done by a qualified specialist – gives your insurer the paper trail they need. An injury during a DIY spring repair is not typically a claim against your homeowners policy at all. If you have a specific claim question, your carrier can give you the definitive answer. If you want the documentation on the repair side, ask for a written estimate and invoice from us.
Torsion spring replacement typically runs $180 to $340 for a single spring installed, and a matched pair costs about twice that. The price is set per job by a written estimate, quoted and agreed before any work starts, and the estimate is free. The variables that affect the range are the spring spec for your door, whether the cables need attention, and whether the door needs rebalancing after the repair. Because the written estimate controls the final price, you’ll see the number before you approve the work and the invoice will match it. Call (866) 926-2341 for an exact quote.
We book same-day repair visits for doors stuck open or stuck closed whenever the schedule allows, and calling early gives the best chance of a same-day slot. We answer 24/7, with fast dispatch from 7am to 7pm, Sunday through Friday. A call outside dispatch hours gets booked into the next opening, Sunday through Friday, 7am to 7pm. If you’re calling about a spring or cable failure, don’t run the opener in the meantime. Call (866) 926-2341 and we’ll get you on the schedule.
We work on the brands most often installed in Easton homes, including Genie, LiftMaster, Chamberlain, Clopay, Amarr, Wayne Dalton, Craftsman, and Raynor. That means we’ve diagnosed the same systems repeatedly and know where the common failure points are, which shortens the time to a correct repair. If you’re not sure of your brand, the model sticker is usually on the inside of a top or bottom door panel or on the opener head. Call (866) 926-2341 and describe the sticker or the symptom, and we’ll confirm before we book the visit.
The Bottom Line
The DIY-versus-professional line for garage doors runs through the springs and cables, not through your skill level. Tier one tasks – remotes, lubrication, travel limits, photo-eyes – genuinely belong in the homeowner’s hands and save you a call. Tier two tasks depend on your comfort with tools and willingness to risk a secondary repair. Tier three tasks – springs, cables, and the bottom bracket – are the never-DIY category because the stored energy in the system doesn’t care how experienced you are. Count the true cost of DIY repair including tools, time, and the odds of a second repair, and the math usually points toward a professional for anything under the spring line. Call (866) 926-2341 for a free estimate. Our written estimate sets the price before any work starts, and we’ll tell you honestly whether the job is worth doing yourself.
Contact
If your door problem crosses into the never-DIY category, our team at Easton Garage Door Repair Pros is ready to help. We handle repair, opener repair, spring repair, parts, and installation under one company, so you’re not handing the job off to a second contractor. Call (866) 926-2341 for a free estimate. We answer 24/7, with fast dispatch from 7am to 7pm, Sunday through Friday. Our technicians have up to 8 years of experience working on the major garage door and opener systems found in Easton homes, and we’ll give you a written price you can agree to before any work begins. For the full range of what we handle, start with Easton Garage Door Repair Pros – and when you call, tell us what your door is doing and what you’ve already tried. That’s the fastest path to a correct repair.
Written by the team at Easton Garage Door Repair Pros.